|
This step is only intended for verifying tolerance for the G7® Grayscale calibration curves.
 Add / Edit Workflows Add / Edit Workflows
Before you go to [G7® Grayscale Correction] step, you may need to add or edit your workflow first.
- Click the Reports and Tools icon on the toolbar (Figure 1).
- Select the [Customize Workflows] button (Figure 1).
- Click the [Add] or [Edit] button for a new or existing workflow, and check [Yes] (ICC-Based) or [No] (Non ICC-Based).
- In the [Workflow Name] box, type a name.
- Click [Workflow Features], and enable the options that you want available. You also can select whether or not you want to print an test image after each step (Figure 2). (NOTE: all features are checked in default settings.)
- Click the] (
 ) button and [Yes] to close the “Workflow Editor” window. ) button and [Yes] to close the “Workflow Editor” window.
Profile as normal up through the ink limit and G7® Grayscale Correction step.
[G7® Grayscale Correction] step
After you have done the [G7® Grayscale Correction] step, the next step is the [G7G7® Grayscale Verification] step.
In the [G7®Grayscale Verification] step;
- Click [Print Swatch] button. This opens “Print Swatch-G7 Neutral Print Density Curves” window (Figure 3).
- In this window, click [Print] button. Make sure [Use”G7 Native CMY”] setting matches what was selected in the G7® Grayscale Correction Swatch. Click [Print] button (Figure 4).
- Click the [Read Swatch] button and read in the swatch.
- After reading the verification swatch, the readings are automatically analyzes and the report indicates whether G7® Grayscale tolerance have been met. If the verification fails, you can click on the [Iterate] button (Figure 4), otherwise click the next button (
 ) to proceed to [ICC Profile] step. ) to proceed to [ICC Profile] step.
- To iterate, click the [Iterate] button in the step 4, then click [OK] (Figure 6). You will need to reprint and re-read a new verification swatch as described above. The number of control points selected in the [G7® Grayscale Correction] step will automatically be used when calculating the iterated curves.
- A new report will display showing the results of the iteration (Figure 6). (NOTE: There is no limit to iterations, but there are diminishing returns after one or two iterations. If the verification still fails, then the print mode settings likely need to be adjusted (ink restrictions, etc.). Also, note that only the current results are saved. There is currently no way to go back to a previous iteration.)
- When you are done, click next button ( ) to proceed to [ICC Profile] step (Figure 6).
For more information and how to use it, go to ONYX TV.
|
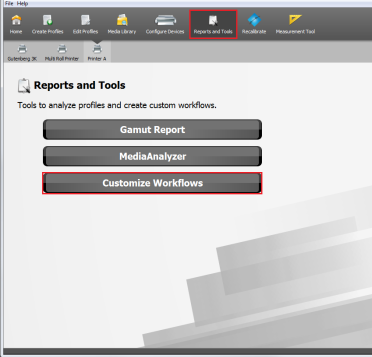
Figure 1
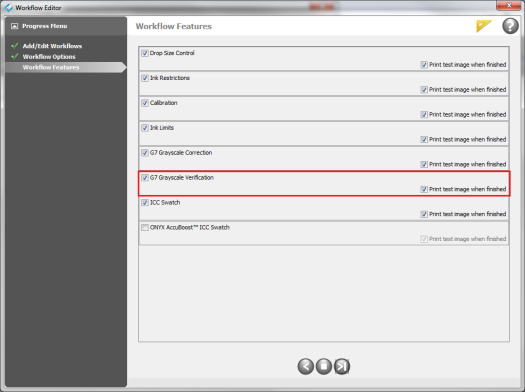
Figure 2
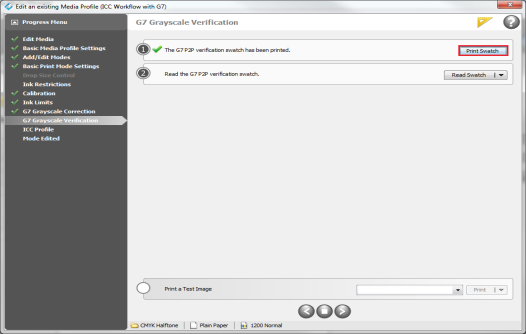
Figure 3
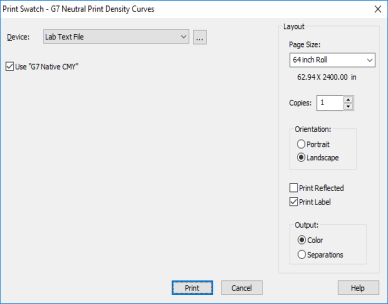
Figure 4

Figure 5
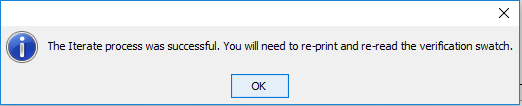
Figure 6
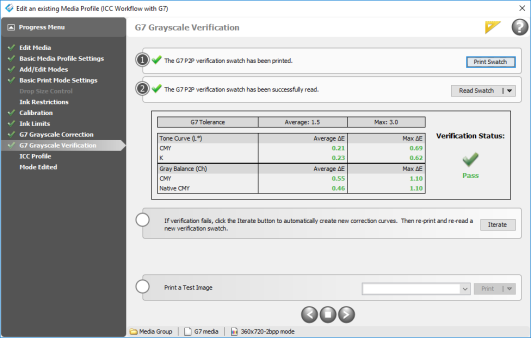
Figure 7
|
|